How To Project Laptop Screen To Wall Without Projector?
Are you looking for a way to project your laptop screen without the need of a projector? You’re in luck. In this article, we will discuss how to easily connect your laptop to any wall or display using basic equipment and minimal technical know-how. With these steps, you’ll be able to create an effective presentation that can reach audiences from anywhere in the room.
With modern technology, it has become easier than ever before to customize our presentations and displays with ease. Whether it’s for work, home or school purposes, having the ability to control your own display–without requiring extra equipment such as a projector–is invaluable. By connecting your laptop directly to a wall or display via cable connection. You can take full advantage of all its features while still maintaining control over what is being presented at all times.
By following just a few simple steps outlined below. You’ll have no trouble learning how to successfully project your laptop screen onto any wall or display without the use of a projector. So if you’re ready to discover how easy it is to project your laptop screen, read on.
Overview
Mirroring a laptop screen to the wall without using a projector is now possible with modern technologies. Screen mirroring, also known as a content casting, allows users to view their laptop display on any compatible device with minimal effort. This technology can be used to connect your laptop’s display options directly to the wall and project an image or multimedia presentation.
The key to successful wall projection lies in finding the right software solution for your laptop’s connections. By utilizing existing tools such as cables, dongles, wireless adapters, and HDMI ports, you can easily find a way to create a seamless connection between your device and the wall. With this setup, you’ll have access to all of your computer’s files and applications from anywhere in the room.
Requirements For Connection
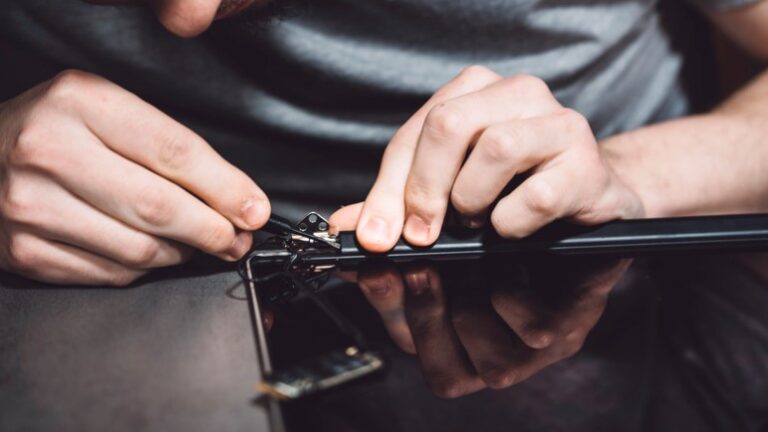
When it comes to projecting your laptop screen onto a wall without the use of a projector, there are certain requirements that must be met. First and foremost, you will need an HDMI cable or laptop adapter in order to make a wireless connection. Depending on the type of device being used, additional hardware such as a display port may also be necessary. Also, power sources for both the laptop and external monitor should be considered when planning out this setup.
With all the required components in place, connecting your laptop to a TV or monitor is relatively straightforward. The most important factor to keep in mind is that the signal from the computer needs to match with what the display can support – otherwise resolution may suffer. If done correctly, however, you’ll have no difficulty enjoying content from your laptop projected onto any surface.
Connecting The Laptop To A Tv Or Monitor
Connecting a laptop to a TV or monitor is an easy process, requiring only the right cable and connection. First off, figure out what type of connections sit on your laptop’s side panel. Typically you’ll find either HDMI ports, mini DisplayPort, or Thunderbolt 3 ports. These are used for connecting with TVs and monitors. If you have none of these options available then using an adapter may be necessary.
Next, check the connections that exist on your television or monitor. You will likely see multiple types such as DVI-D or VGA ports for computers. The best option would be if both the laptop and device have similar connectors –. From there it’s simply a matter of plugging in the correct cable between them.
In some cases, you may need additional adapters or converter cables to make this happen though. So double-check before purchase. With all components connected correctly, powering up both devices should allow content from one device (laptop) to appear on another (TV/monitor). This can provide a great way to project a laptop screens onto walls without needing any projector setup at all.
Connecting The Laptop To A Projector
Now that you have connected your laptop to a TV or monitor, the next step is connecting it to a projector. This will allow you to project your laptop screen onto any wall with an HDMI-compatible projector. It’s easy to set up and offers great flexibility for presentations, movies, games, and more.
First, connect your laptop and projector using either an HDMI cable or a VGA adapter. If you are using an HDMI cable, make sure both ends of the cable are securely plugged in before turning on either device. Make sure all cables are firmly attached before continuing. Then turn on the power switch located at the back of the projector as well as your laptop’s power button. This will initiate the connection between them.
Once they are both powered on, open up display settings on your computer and select “Duplicate” or “Extend Desktop” from the options available. Duplicating allows you to show exactly what is displayed on your laptop screen directly onto the projector while extending desktop mode enables your laptop image to be mirrored across multiple displays including projectors. Both methods enable powerful projection capabilities from your laptop. Gives you control over how images appear when projected onto walls or other surfaces without needing a separate device like a traditional projector setup would require.
Streaming Content From A Smartphone/Tablet To A Tv/Monitor/Projector
Streaming content from a smartphone or tablet to a TV, monitor, or projector has become increasingly popular in recent years. With the right software and hardware setup, it’s possible to project your laptop screen without the need for an external projector. But how?
In this section, we will explore various methods of streaming content from smartphones and tablets to TVs/monitors/projectors using cable connections as well as wireless solutions. We’ll look at options such as HDMI cables, Apple AirPlay, Miracast technology, Google Chromecast, and more. All are designed to provide users with an easy way to connect their devices to larger displays. There are also some software solutions available that allow you to mirror your device’s screen on another display without any additional hardware.
By understanding these different techniques for connecting smartphones and tablets to TVs/monitors/projectors, users can gain greater control over their viewing experience and enjoy media on a bigger scale than ever before.
Software Solutions For Screen Mirroring
Screen mirroring solutions can provide a convenient way to project laptop screens onto walls without the need for a projector. Software solutions such as wireless display software, screen sharing programs, and desktop mirroring applications allow users to easily connect their laptops wirelessly to external displays or even another computer. Dual-screen applications also offer an easy solution for projecting content from one device to another.
These solutions are user-friendly and often require minimal setup time. They provide users with control over how they project their laptop screen, allowing them to adjust resolution settings and customize presentation options according to their needs. Additionally, these solutions usually come equipped with security measures that help protect against unauthorized access or data leakage.
With these tools in hand, users have all they need to successfully project their laptop’s contents onto any surface of their choosing. Moving forward then, let’s take a look at troubleshooting some of the most common issues associated with screen mirroring applications.
Troubleshooting Common Issues
After discussing the software solutions for screen mirroring, it’s time to turn our attention to troubleshooting common issues. When attempting to project a laptop onto a wall without a projector, disconnection problems can arise from incompatible hardware or poor signal strength. To resolve this issue, check whether your laptop and TV are compatible with each other, as well as if you’re using the right cables for connecting them together. If that doesn’t solve the problem, try boosting your signal strength by moving closer to the router or changing your Wi-Fi channel.
When mirroring content from a projector to a monitor or TV. There may be certain streaming issues that cause the picture quality to be distorted or pixelated. The best way to fix this is by making sure both devices have been set up properly in terms of resolution settings and audio output format. Additionally, keep an eye out for any updates available on either device which could improve their compatibility with one another.
Smartphone users who have trouble displaying content on a second device should first check their settings before anything else. Make sure Wi-Fi has been enabled; otherwise, nothing will appear onscreen even after setting up the connection between devices correctly. After confirming everything is working properly, close all applications in order to free up RAM space so content can stream smoothly across platforms. Once done, restart your phone and retry connecting again – chances are you’ll encounter fewer problems along the way. By taking these steps into account when trying to troubleshoot projection issues involving laptops, monitors, and smartphones alike, we can make sure our display experience remains top-notch at all times.
Frequently Asked Questions
How Much Does It Cost To Project A Laptop Screen To A Wall Without A Projector?
Projecting a laptop screen to a wall without using a projector is possible, but it comes at a cost. It’s important to understand the budget involved and what price you can expect to pay when projecting your laptop display onto an external surface like a wall or large monitor.
When it comes to the cost of projecting a laptop screen to a wall without a projector, there are several factors that play into the overall budget. Primarily, this includes hardware costs such as cables, adapters, and other necessary components for setting up the connection between the computer and the external display. On top of that, additional software may be required in order to enable certain features like image mirroring or extended desktop modes which can significantly increase the total cost.
Considering these key elements of projecting a laptop screen onto an external surface:
- Cables and Adapters – Depending on the type of ports available on both devices (laptop/wall) different cables/adapters might need to be purchased separately in order for them to connect properly. Costs vary depending on cable length and quality needed for optimal performance.
- Software – Some laptop models require special drivers or applications installed before they will allow their screens to be projected onto an external surface like walls or large monitors. These software packages typically come with associated fees ranging from $10-$200. It depending on whether they are made by third-party developers or manufacturers themselves.
- Hardware Installation – If all else fails, professional technicians may need to be hired in order to set everything up correctly so that laptops can project their displays onto walls without any issues arising later down the line. This could add even more expenses since labor rates differ greatly based on the geographic location and skill level of those who perform installations.
It’s important to note that while some costs are unavoidable due to hardware requirements. Others can often be minimized through careful planning ahead of time and researching potential solutions beforehand. Instead of relying solely on outside help after problems arise unexpectedly during the setup process itself.
With thoughtful consideration towards projected costs prior to beginning the installation process, users should find that successfully projecting their laptop’s display onto walls doesn’t necessarily have to break their bank accounts altogether.
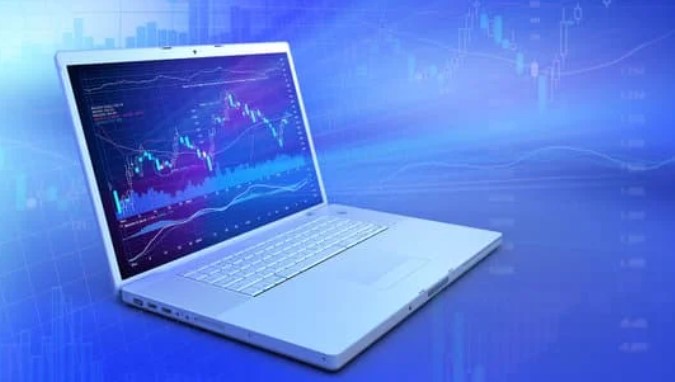
What Type Of Cables Do I Need To Connect My Laptop To A Monitor Or Projector?
It can be confusing to know what type of cable you need when connecting your laptop to a monitor or projector. But with the right information, choosing and setting up the correct cables is simpler than it seems.
When considering which connections are available for use with laptops. There are five types of cables that come into play: HDMI, VGA, DVI, DisplayPort, and Thunderbolt. Each one offers different levels of image quality and transfer speeds so let’s take a look at them in more detail.
HDMI (High-Definition Multimedia Interface) is by far the most popular connection used today as it provides both audio and video outputs using only one cable. It supports resolutions up to 4K UHD (Ultra High Definition). Making it ideal for streaming high-quality content from devices such as laptops, game consoles, and BluRay players. For those looking to connect older monitors without an HDMI port, a VGA (Video Graphics Array) cable may be used instead. However, this will limit resolution capabilities to 1080p Full HD or lower.
A step up in terms of picture quality comes with DVI (Digital Visual Interface). This connection supports higher resolutions than VGA. However, it requires two separate cables – one for audio and another for video output. This means it isn’t quite as convenient as HDMI.
Check before buying to make sure your device supports DVI, HDMI, or DisplayPort for digital/analog data transmission. DisplayPort offers superior image clarity for 4K UHD resolutions.
Lastly, Thunderbolt cables offer blisteringly fast data rates compared to other options. But are less common due to their relatively expensive price tag – not something everyone needs.
Can I Use A Wireless Display Adapter To Connect My Laptop To A Wall?
It is possible to connect your laptop to a wall using a wireless display adapter. This type of adapter allows you to wirelessly transmit the image from your laptop’s screen onto another device, such as an HDTV or projector. It can be used with Windows and Mac laptops, giving users greater flexibility in connecting their laptops to larger displays.
The process for setting up this connection is fairly straightforward. You will need the adapter, which comes with all the necessary cables and adapters to make the connection. Once connected, you should configure the adapter on both devices so they are able to communicate with each other over the wireless network. After, you’ll be ready to project your laptop’s screen onto the wall without needing a physical projector.
Using one of these adapters gives you more control over how you present information from your laptop. For instance, if you’re presenting a PowerPoint presentation at work or school. It’ll give you much better visuals than those provided by simply plugging into a computer monitor or traditional projector setup. And because it’s wireless, there won’t be any cords running across floors or walls like when using wired connections.
Are There Any Special Settings I Need To Enable On My Laptop Before I Can Project The Screen?
Projecting your laptop screen onto a wall without the use of a projector may seem like an impossible feat. But with the right settings enabled on your laptop, it’s not only possible but surprisingly easy. Whether you’re looking to show off some presentations or watch movies from afar. Here are all the special settings you’ll need to enable in order to get started:
- Display Settings:
- Text Size and Colors: To ensure that everything displays correctly and can be seen clearly. Check that the text size is set appropriately for your environment. You should also adjust any color settings so that they look good against the wall.
- Refresh Rate: Make sure this is set at its highest rate. So there won’t be any flickering when projecting the image.
- Network Connectivity:
- WiFi or Wired Connection: Depending on whether your device has wireless connectivity or requires a wired connection. Make sure that it can connect to whatever network you will be using.
- Quality of Service (QoS): If QoS is required by your wall projector. Make sure that it is properly configured before attempting to project anything.
- Video Output Options:
- Resolution and Aspect Ratio: Double-check these settings. Since they determine how crisp and clear the image looks when projected onto the wall. It’s best to choose a resolution setting based on what type of projector you have available, such as 1080P if you’re using an HDTV monitor. Additionally, select an aspect ratio suitable for viewing images at a distance; usually, 4:3 works best in most cases.
By following these steps carefully before attempting to project anything, you can guarantee smooth sailing. Enabling all necessary settings on your laptop in order to get up and running quickly. So take advantage of this convenient technology today – no matter where life takes you.
Does Projecting The Laptop Screen To A Wall Consume More Battery Power?
Projecting a laptop screen to a wall without the use of a projector is becoming increasingly popular. This technology can be conveniently used in many scenarios, such as presentations or simply watching movies on a larger display. However, one important thing to consider is whether this process consumes more battery power than usual.
When projecting the laptop screen onto a wall. Devices usually consume more energy due to changes in lighting levels and other factors related to the projection itself. It is essential for users to know how much their device’s battery will be affected by engaging in this activity. Generally speaking, laptops that are already running at full capacity may find their power drained quicker when projected onto walls compared with those which do not project images.
Make sure you enable the settings in your laptop before you attempt wall projection from it. These settings vary depending on the make and model of your device. But typically involve enabling external displays via your computer’s system preferences. Although there might be some initial setup required, overall using wall projection instead of a projector comes with huge benefits. Especially if you’re looking for an easier way to showcase content without worrying about extra power consumption.
Conclusion – How To Project Laptop Screen To Wall Without Projector?
In conclusion, there are several cost-effective ways to project a laptop screen onto a wall without using a projector. With the right cables and adapters. One can quickly connect their laptop to any monitor or projector in order to display images on a large scale. Furthermore, it is important for users to enable the necessary settings on their laptops before attempting this process. Additionally, projecting the laptop screen does not consume more battery power than usual. But may result in a slight decrease due to increased usage of processing power.
Overall, with careful research and preparation. Anyone can project their laptop screen onto walls without having to spend money on expensive equipment such as projectors. People can take advantage of modern technology such as wireless displays and cable connections to create stunning visuals. This allows them to present ideas or information quickly and effectively while creating an impactful experience for everyone present.
Also read:
How to screenshot on a Sony laptop
How To Protect Laptop From Scratches?